


Dracthyr Evoker Starting Zone Walkthrough
Dracthyr Evoker Starting Zone Walkthrough
Important Things to Know About the Starting Zone Experience
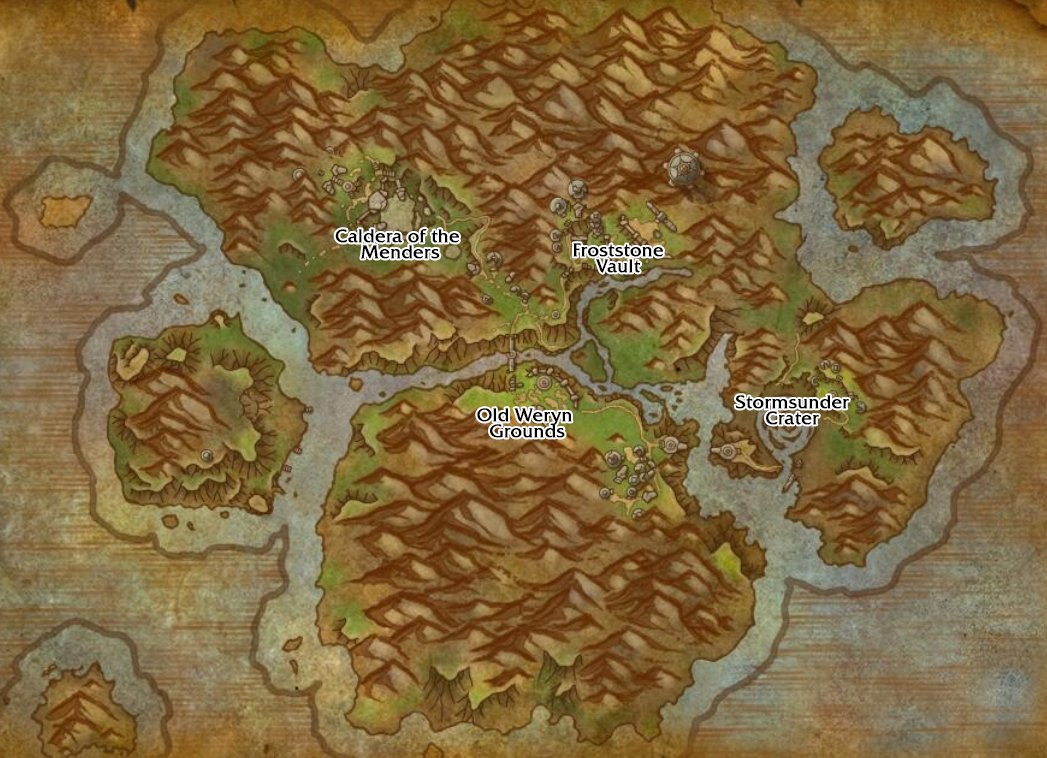
The Forbidden Reach is the beginning zone, a huge terrain with different heights designed to make learning to fly as a Dracthyr more exciting.
Here are some facts about the starting experience of the Evoker:
- Evokers are a Hero Class and always start at level 58 in their own dedicated starting area, the The Forbidden Reach.
- You will only be able to make one Dracthyr Evoker per realm.
- Forbidden Reach will start with a full set of iLvl 206 Uncommon gear. Over the duration of the beginning zone, you will replace this with ever better gear, with quest gear reaching a maximum Rare iLevel 236. Rare equipment will occasionally Epic upgrade to iLvl 242. You will exit the zone with a set that is iLvl 225-230, which is more than suitable for beginning your leveling journey in the Dragon Isles. A level 60 enhanced character, on the other hand, starts with an iLevel of 180.
- You start with generic Evoker powers and won’t be able to choose your specialty until towards the conclusion of the beginner campaign.
- Evokers begin with five abilities (three Racial abilities and two spells) and get additional as they go through the initial zone. They are as follows:
- Glide (Racial) – a Slow Fall-like ability
- Tail Swipe (Racial) – Lash out with your tail, knocking enemies within 6 yds into the air. Useful as an interrupt as well as putting in a little distance.
- Wing Buffet (Racial) – With a powerful flap of your wings, knock away enemies in front of you.
The main difference between Tail Swipe and Wing Buffet is direction; Tail Swipe gets all enemies within 6 yards even if they’re behind you, while Wing Buffet only knocks away enemies in front. - Azure Strike (Spell) – an offensive spell that hits 2 enemies at once.
- Living Flame (Spell) – a single-target spell that damages an enemy or heals yourself or an ally, depending on which you target.
One advantage of learning to fly as a Dracthyr is that it will come in handy when you begin Dragonriding in the Dragon Isles. Even now Dragonriding may be built to a much higher extent, the basic concepts remain the same.
Up to the end of Chapter 6, Wrath of the Storm-Eater, the Alliance and Horde enjoy essentially comparable leveling experiences. After this, you’ll either travel to Stormwind (All Along the Watchtowers) or Orgrimmar (The Dark Talons) for Chapter 7. The only other distinction is that in the Forbidden Reach, you will only encounter players from your faction.
The Evoker starting zone is similar to the Death Knight starting zone in many aspects. The mechanics and usage of abilities are introduced to you during the duration of the initial region. You get a full set of Rare starter gear that will come in handy after you leave the starting region. And, although the greeting you’ll receive when you first arrive in Stormwind or Orgrimmar isn’t unfriendly, it’s also not exactly warm.
Wowhead Evoker Guides
While you will be prompted to pick one of the two class specialities (Devastation or Preservation) late in the beginning zone experience, you will only have a limited amount of options. You won’t be able to choose your entire set of abilities until you leave the Forbidden Reach. Still, you should read the tutorials that our professional Evoker class authors will be writing shortly! These tutorials will assist you in mastering the class in PvE conditions when you have access to the whole set of skills. When these instructions become available, we will post links to them.
The Starter Campaign: Dracthyr, Awaken
Chapter 1: The War Creche
The first chapter introduces you to the lore of the Dracthyr.
Awaken, Dracthyr
Awaken the other Dracthyr.
You will be granted the Disintegrate ability momentarily as a right-click ability in order to unfreeze your fellow citizens; the spell will become yours permanently if you complete the mission. Your first task is to walk around and Awaken the frozen Dracthyr. These are shown on the map by yellow dots and look to be sculptures rather than live animals. However, one will not be in such good form.
Run around to the indicated areas. You will be prompted to use Glide to slow your fall.

Once you’ve awoken the three frozen Dracthyr Talon Kethahn, Tethalash, and Scalecommander Azurathel, report to Scalecommander Azurathel and you’ll receive Disintegrate as a permanent spell.
Arcane Guardians and Gear Up
Arcane Guardians: Defeat 4 Conjured Guardians or Ancient Constructs
Gear Up: Acquire weapons, armor, and supplies.
Conjured Guardian, Ancient Construct, Ancient Splinter
These both operate in the same area, so pick up both of these at once. You can’t move on until you complete both quests anyway.
Gear Up requires finding Stack of Weapons, Crate of Warscales, and Decayed Rations. These are easily located on the map.
Neither Conjured Guardians nor Ancient Constructs are inherently hostile, so you can pick and choose which you do. You can do any combination of the two. However, there is one Ancient Construct that spawns near the Decayed Rations at /way 34.1 61.4. This one will go hostile once you pick up the rations if it’s up, so in the interest of efficiency, don’t kill more than three elsewhere.
These have very few mechanics, other than that Ancient Constructs will cast Splinter at about 35% health and turn into two Ancient Splinters. This is a good chance to practice Azure Strike.
Reward for Gear Up is the Emblazoned Ruby Staff.
Side Treasure: The Locked Library
This isn’t part of the quest line, and you won’t earn anything permanent for it, but it does expose you to something you’ll see throughout the initial zone: boss drops or treasures that grant temporary bonuses rather than things.
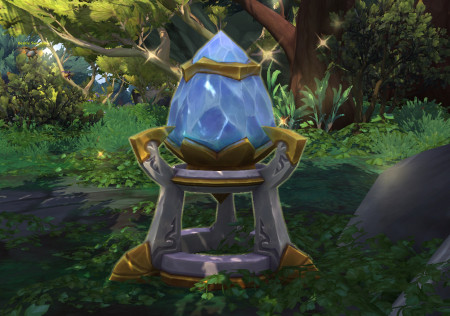
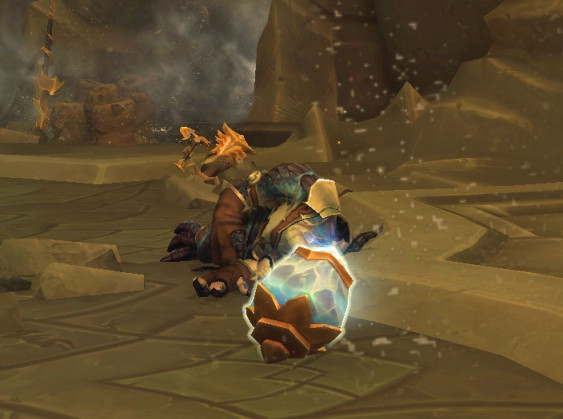
As you’re going through the area for the quests above, you will see a sparkling crystal next to a stand, near a door with an arcane barrier, around /way 35.8, 74.0.
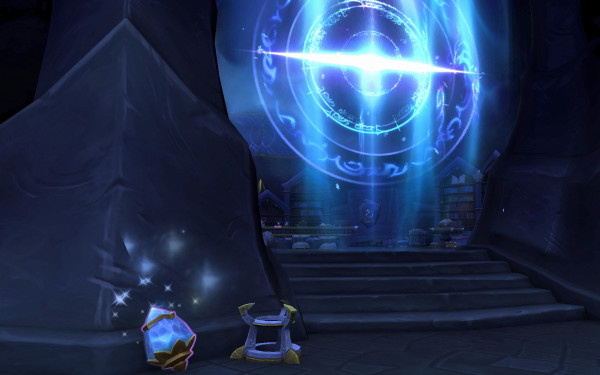
Pick up the crystal and set it in the stand. This will unlock the library. Go inside and you’ll see a purple glowing wand on the center table.
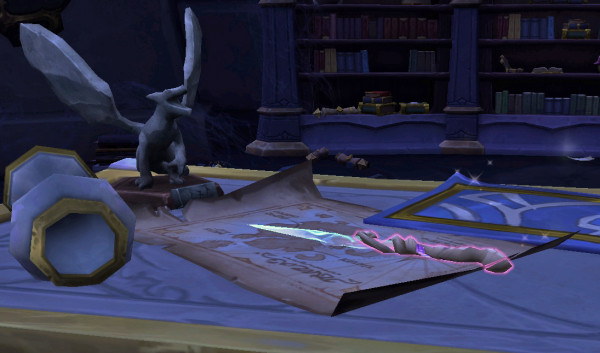
This may appear odd at first since it will appear to have added a Blue Magic Wand to your inventory, but if you examine, you will only discover a Snapped Wand. This is because this item enhances you rather than providing you an item. This grants you the buff Seething Blue Magic, which grants you a chance to deliver Arcane damage to the target for 10 minutes after dealing damage.
This isn’t the first buff item you can get in the Forbidden Reach, but it’s your introduction to the concept.
Into the Cauldron
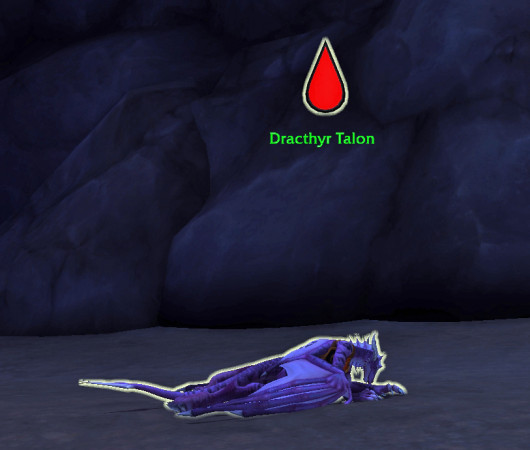
You’ll be introduced to Into the Cauldron through a cinematic, your first major enemy to defeat. You’ll then be asked to Glide into the Earth-Warder’s Cauldron and rescue/heal other Dracthyr with Living Flame.
Finding injured Dracthyr Talon (they’ll have a large blood drop above their heads) and casting Living Flame on them is the quickest method to finish this. You can stand some distance away because this is a ranged spell. Any hostile mobs near your target, on the other hand, will aggro you. Fortunately, Living Flame cuts both ways and can be used to destroy your enemies.
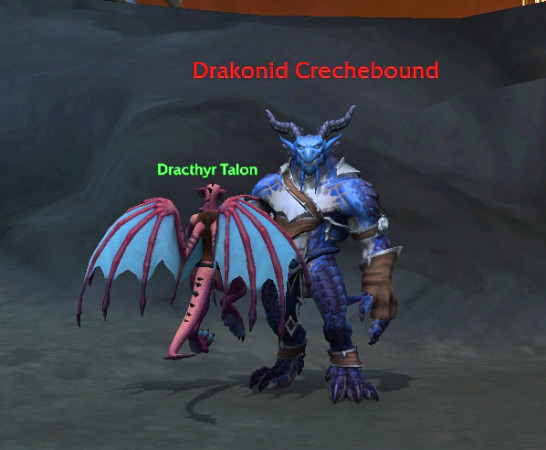
You can also rescue a Dracthyr by finding a Talon that’s in the clutches of a Drakonid Crechebound and killing its captor. Killing a Drakonid Crechebound that’s simply near a Talon doesn’t constitute a rescue.
Rewards the Crimson Dracthyr’s Drape.
The Dragon at the Door
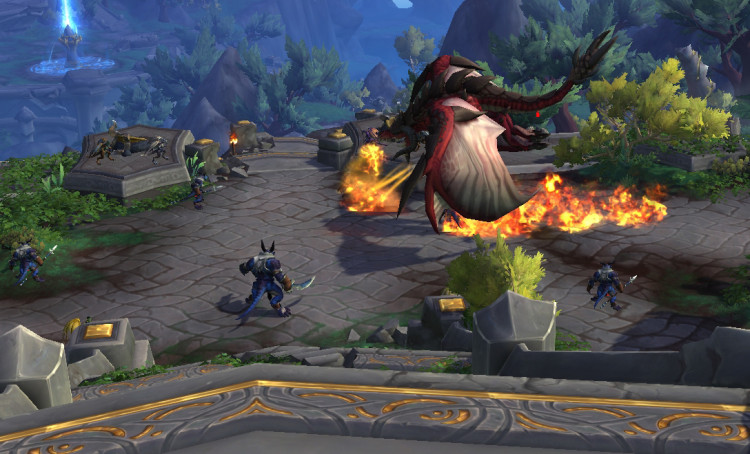
Defeat Lapisagos and escape the War Creche.
This is a rather straightforward fight; he has roughly 1/4 health, so despite being an elite, he’s simple to beat. The main challenges are staying out of his Frost Breath, which appears in a cone in front of him, and dealing with the little Volatile Remnant additions that arise from time to time. Because he does not transform when he breathes in for his Frost Breath, you can quickly spot it and get away from him before you are converted into dry ice. When your health drops below 50%, you’ll be encouraged to use Living Flame to restore yourself.
Rewards Crystalline Lapis trinket.
You should have attained level 59 by now and learnt the non-combat resurrection spell Return. Leave the creche and enter the Old Weryn Grounds, which serves as a type of mission hub for the rest of the game.
This concludes Chapter 1: The War Creche.
Chapter 2: Old Weryn Grounds
This chapter is mostly about learning some of the mechanics for your Dracthyr abilities.
Arcane Intrusion and The Fire Within
Arcane Intrusion: Investigate the beacon at about /way 45.4 54.0
The Fire Within: Learn to cast Fire Breath. Cast an Empowered I Fire Breath, Empowered II Fire Breath, and Empowered III Fire Breath.
Arcane Intrusion is very simple — just go down the stairs and click on the beacon.
The Fire Within grants you a new spell to use called Fire Breath. This quest teaches you how to use the Breath attack. The mission is ambiguous and does not teach you how to use this skill.
Beta Note: These exact mechanics may change, but in Beta, this only functioned if you used your keyboard to trigger the spell on your spell bar; mouse-clicking the spell bar did not work. It is possible to remove it from your spellbook by mouse click, although this is even more inconvenient.
The first thing you should do is locate a Fire Breath Infuser and position yourself near to it. This allows you to reset Fire Breath’s 30-second cooldown on demand, allowing you to practice casting it numerous times.
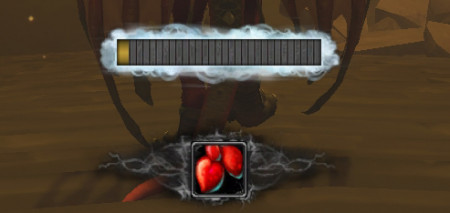
The main mechanic is that you take a deep intake breath and then expel it with fire. The longer you inhale, the stronger the fire sensation becomes.
This is determined by how you configure your spell choices. Empowered Spell Input has two possibilities under Gameplay-Controls: Hold and Release or Press and Tap. Hold and Release is the default setting. Try both to find which you prefer.
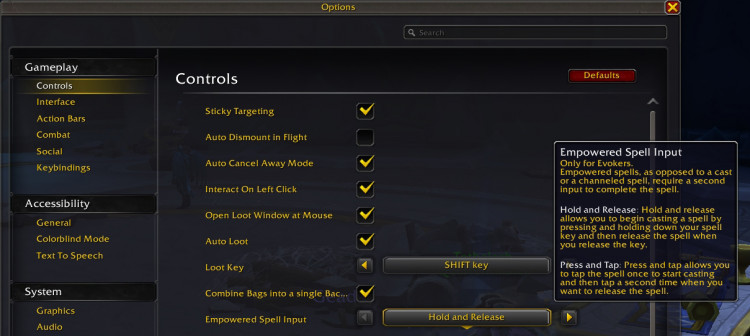
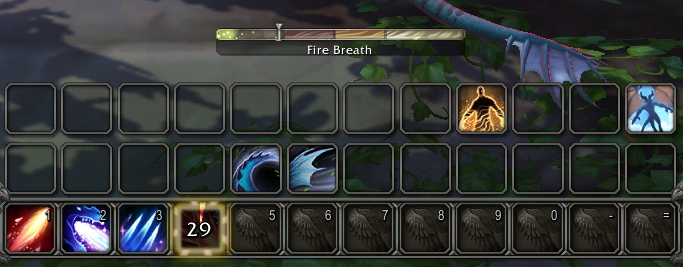
Hold the number key matching to the spell’s location on the spell bar to charge the spell, then release when ready to cast. The bar will be visible down below, and a slider will show how far you’ve charged it. This one is just halfway through Empowered Fire Breath I:
With Press and Tap, you click it once to start breathing in, and click it again when you want to release the breath.
Pure Opinion: Personally, I found Press and Tap less prone to user error and easier to use in an actual combat situation, particularly if you want to move while casting.
When you are charging your spell, you will see lines on the ground that show you where the cone will cast. You have time during charge-up to reposition the cone.
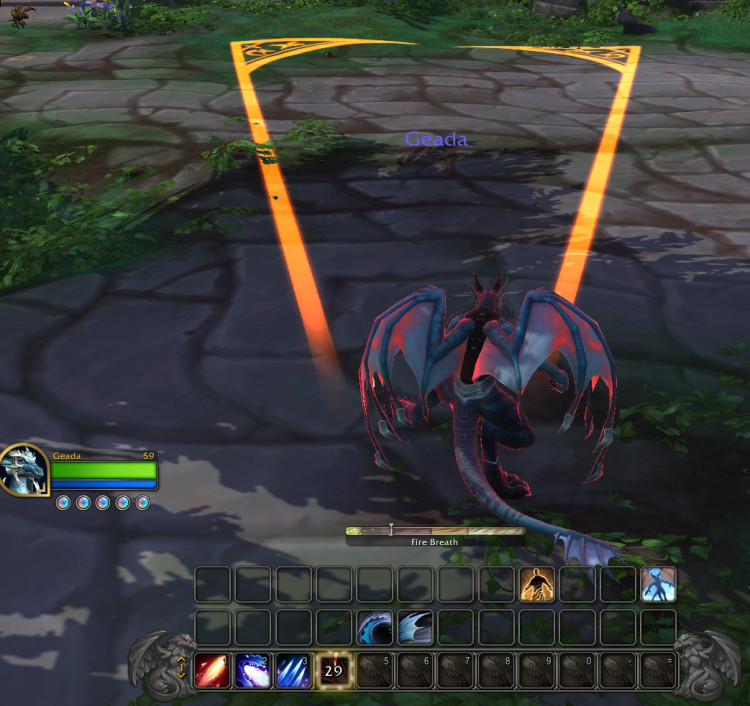
Just watch where you’re pointing it during practice!
Simply practice taking in and releasing different lengths of breaths. Cast Empowered I for the first bar, Empowered II for the second, and Empowered III for the final.
Completing this quest will teach you Fire Breath as a permanent Red spell.
Stretch Your Wings
Learn the Soar racial ability.
There are actually three separate tasks in this series:
- Learn to use Soar
- Learn to dive using Soar
- Learn to use Skyward Ascent and Surge Forward with Soar.
Because these are the same talents required for Dragonriding in Dragon Isles, you’ll have an advantage over your other gamers because the mechanics will be familiar to you.
Important: You are given the quest item Try Again as an action button that allows you to restart a particular set of tasks; use that to restart part of the quest instead of abandoning the quest. If you abandon, you’ll start over on the first step, losing all progress.
First task: Practice Soar
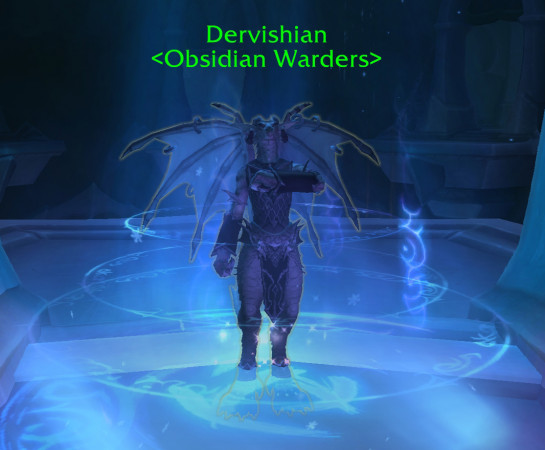
Talk to Dervishian to learn the Soar ability. This will also reveal the rings. First task: Soar through five rings.
Soar has a four-second cast time, so don’t release it too early. You’ll go up into the air and start coasting forward. Hit the rings in succession. Don’t worry if you miss one; you’ll have enough lift to circle back and pick it up.
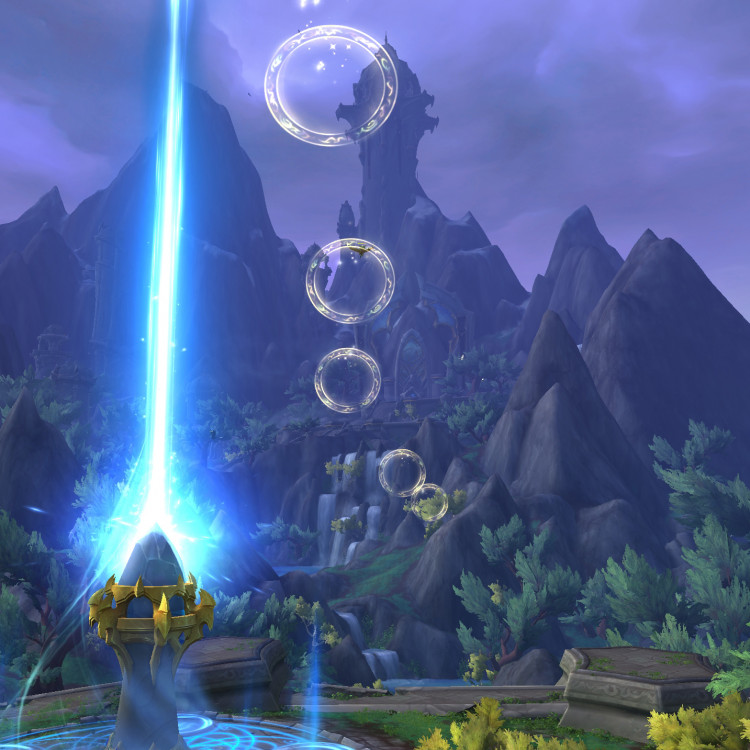
Second task: Learn about diving
Soar through 5 rings.
If you don’t talk to Kodethi first, you won’t be able to view the rings you need to travel through. They’re on a ledge overlooking a river, not far from where you landed after your successful landing. Fly through the circles. The pattern makes little sense from the ground but becomes evident once in the air.

This is a maneuvering assignment that is very simple once you’re in the air and can see where you’re intended to go. When you click Soar, you’ll see the first ring. Dive down through it and the next three rings, then slightly upward to pass through the fifth and final ring. This shows you how to use gravity to accelerate your approach. You can attempt this one several times if necessary. When you see the pattern for the first time, it becomes much easier.
Again, if you fail, click Try Again.
Third task: Learn about Advanced Flying: Skyward Ascent and Surge Forward
Use your new abilities to get through 3 rings.
Teaches you about new abilities Surge Forward and Skyward Ascent (if these don’t appear on your spell bar, they will be under General in your spellbook). Skyward Ascent gives you a lift up and has 1 charge; Surge Forward makes you to move forward more quickly and has 2 charges. Time these carefully, as they have cooldowns.
You are whisked back to the Old Weryn Grounds for this mission. This is another another “fly through the rings” mission (just three this time), but the circles begin considerably further out than they did in the last job.

Rings are also taken from this one as you progress through it, so if you just go through the first ring, you’ll have to go much further the next time. Fortunately, when you Try Again, your charges will be reset, so you’ll still be able to make it.
I had most success by clicking Surge Forward about halfway to the first ring, and then as soon as I passed the first ring, clicking Skyward Ascent. This is usually enough to get me through all three rings without even having to recast Surge Forward.
After completing this quest, you learn Soar, Surge Forward, and Skyward Ascent as permanent abilities.
Train Like We Fight
Practice Soar.
There isn’t much you have to do here. Just hit Soar and you’ve completed the quest. Just circle back behind where you started to fly to the quest turn-in mob, Scalecommander Emberthal. You’ll receive Crimson Dracthyr Battlegear Helm as a reward.
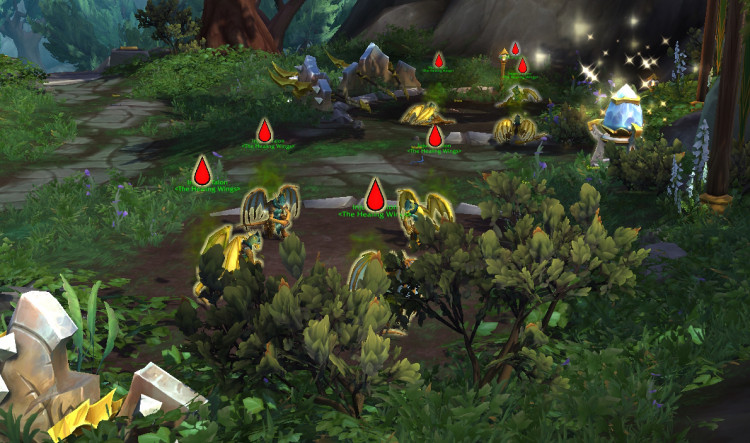
Chapter 3: The Healing Wings
Caldera of the Menders
Meet Cindrethresh in the Caldera of the Menders.
The Caldera of the Menders is located to the north and west of the Old Weryn Grounds. Soar off over the bridge from the end of the stone platform where you exercised your powers. Remember to utilize Surge Forward and Surge Forward to help you get there. To go to the Caldera, you’ll need to Soar again to leave the second platform, but happily it will reset for you.
Side note about Soar: Dracthyr flight ability is not a free flying card. There are places you still can’t get to with Soar. You’ll find some areas of the starter zone where it doesn’t work at all, either due to limitations of the quest or due to geographical features that mysteriously prevent you from flying over them.
Meet up with Cindrethresh and turn in the quest.
Into the Hive
Follow Cinderthresh to find Viridia.
Good news: you aren’t meant to succeed here. So don’t worry about when you choke and keel over from the fumes.
You’re about to enter a creche filled with deadly smoke and fumes, and the only advise you get is to “take a deep breath.” This isn’t exactly working. A progress indicator will appear, indicating how close you are to a complete poison load from Choking. There’s nothing you can do about it except accelerate the process by rushing into the heaviest clouds. You’re supposed to pass out. Don’t fight anything; simply flee. When it happens, you’ll wake up on the other side, unscathed.
On turn-in, you’ll be rewarded with Crimson Dracthyr Battlegear Hauberk.
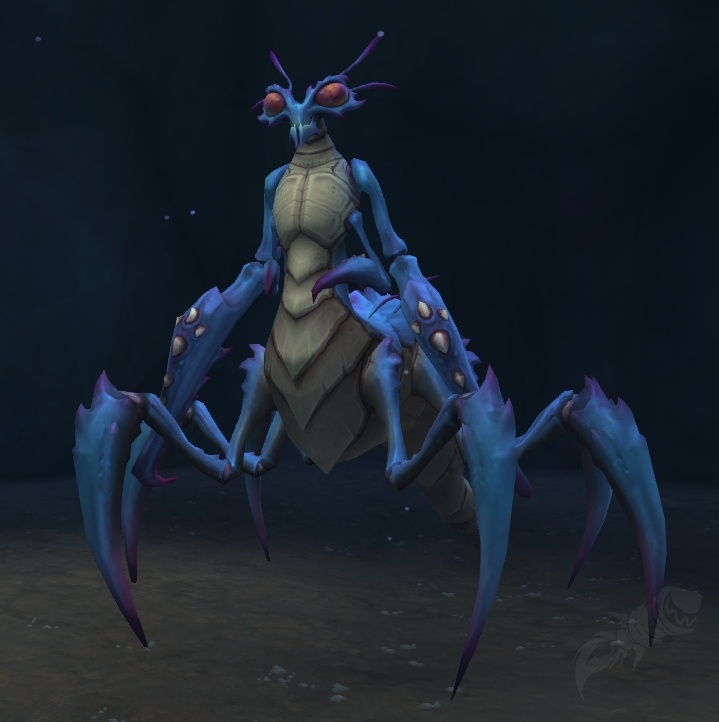
Easy Prey and A Toxic Problem
Easy Prey: Slay 4 scythid
A Toxic Problem: Collect 6 Toxin glands
Run down from the platform into the jungle below. You will be targeting Scythid Steamstalker giant bugs for Easy Prey, and the small Scalerender Beetle and Mature Scalerender tree-dwellers for A Toxic Problem.
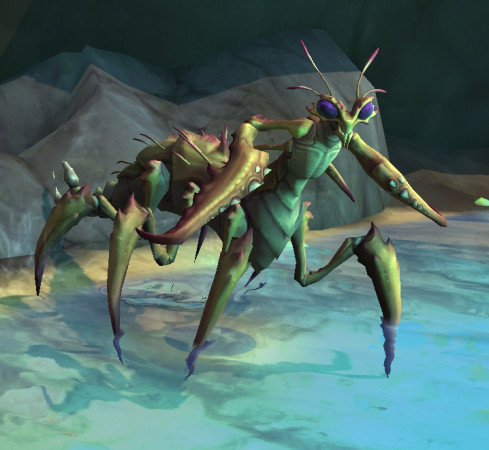
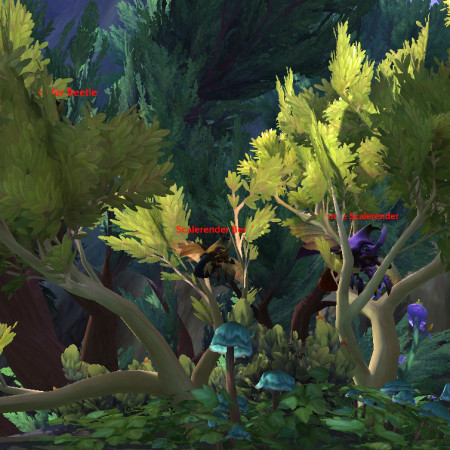
Scythid Steamstalker and bunches o’ beetles
There is another quest you’ll get as you’re out looking for your bug buddies, Halp!, so don’t miss it. You can do this as part of the overall run.
Once you’ve completed Halp!, Easy Prey, and A Toxic Problem], turn them all in, with Halp! first. Easy Prey awards Crimson Dracthyr Battlegear Belt.
Halp!
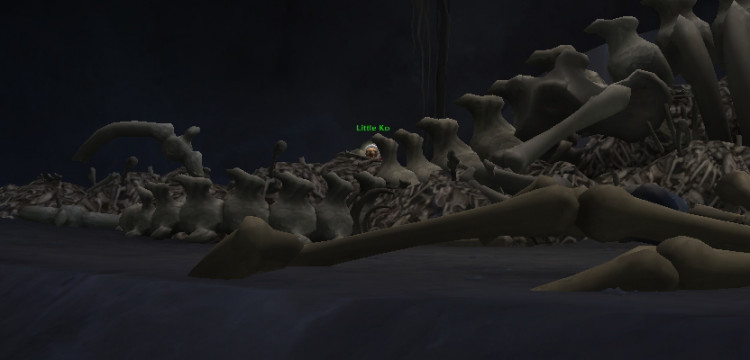
Rescue Little Ko.
As you’re bug hunting, you’ll run into a Tuskarr child named To’no, near a cave. He tells you his sister Little Ko is lost and … well, needs halp.
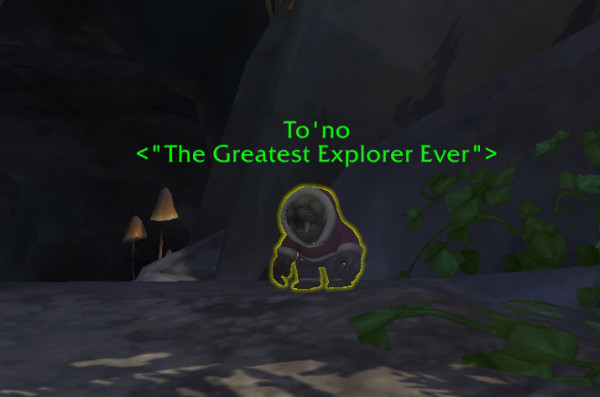
Go inside the cave (Lair of the Scythid) and look for a ramp leading up and to the right. At the top of the ramp, you’ll see a large skeleton ahead with Little Ko hiding behind it at /way 27.4 36.5. Click her to rescue.
Just below the ramp is the spawn spot for Scytherin. It’s worth fighting while you’re there, since it drops Scytherin’s Barbed Necklace.
When you’re ready to leave the area (finish up Easy Prey and A Toxic Problem before you go), follow along the south edge of the crater and you’ll get to the parents around /way 21.8 29.4.

The most wholesome thing you’ll see today.
You’ll reach level 60 at this time and learn two party/raid buffs: Fury of the Aspects and Blessing of the Bronze. You will also get new talent points, although the skills are not yet accessible. Go up to the platform to complete your remaining missions.
Mercy First
Heal injured dracthyr and drakonid.
This quest teaches you Emerald Blossom, an AoE ranged heal spell that heals up to three teammates at once. The mission requires you to descend into the region below in order to heal groups of injured Dracthyr and Draknoid, as well as Atrenosh Hailstone. Emerald Blossom Infusers may also be used to reset Emerald Blossom’s 30 second cooldown.
Find groupings and place Emerald Blossom in the center of them. You are not needed to utilize Emerald Blossom at all; you can use Living Flame instead (or, more likely, bandages, because it does not specify how the healing is achieved). However, Emerald Blossom is more efficient for groups, especially as it may be reset with the Infusers. Pick up the spares with Living Flame.
Turn in for Crimson Dracthyr Battlegear Grips.
Never Forgotten
Recover items and survivors from within the Support Creche. Find Rethenash, Tenezeth, Katrinasa, and rescue 10 survivors.
It’s back into the stinky chambers full of Choking Gas! What fun!
Seriously, at least you have a technique to deal with the Choking debuff this time. You’ll have a unique action button called Toxin Antidote that has a six-second cooldown. Clicking this will significantly lessen your toxin load. Use often, especially shortly before interacting with any item. This will reduce your toxic load and prevent you from passing out before you’re ready.
When you’re standing near smokers, you’ll acquire toxic charges quicker since they generate Choking Gases, which exacerbate the symptoms of typical Choking. You’ll want to stay away from them… until you don’t.
You must open a door with a mystical barrier to save the survivors. As with the Locked Library, there will be a stand next to the entrance and a crystal to your left. Return the crystal to the stand and let the survivors out. You can use Toxin Antidote without losing the crystal.
Now comes the time that you want to pass out.
Once you’ve accomplished all of your objectives, the quickest way out is to succumb to the fumes. When you collapse, you’ll be transported at the foot of the mission turn-in. After completing the quest, you will gain the racial ability Hover and the Verdant Dracthyr’s Band.
The Healing Wings
Speak with Emberthal.
This quest returns you to the Old Weryn Grounds. This is a lengthy journey, and you won’t be able to return on an ordinary Soar since the mountains ahead demand too much lift.
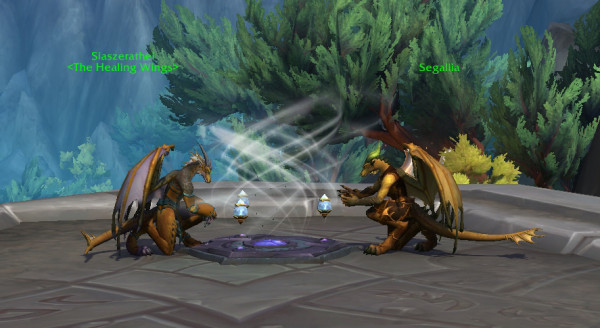
Although nothing in the mission text or conversation suggests it, you do have a simple route back. If you look around, you’ll notice two Dracthyr, Siaszerathel and Segallia, close to a purple pad called the Soar Enhancer. Step on here to cast an Enhanced Soar that will take you all the way back to the Old Weryn Grounds without requiring you to steer.
Alternatively, you can use your hearthstone. But the Enhanced Soar is much more fun.
Reporting back to Emberthal will reward Crimson Dracthyr Battlegear Treads.
This concludes Chapter 3: The Healing Wings.
Chapter 4: The Ebon Scales
Stormsunder Crater and Cavalry Has Its Place
Stormsunder Crater: Meet Azurathel at Stormsunder Crater
Cavalry Has its Place: Learn to ride your personal vorquin mount.
Stormsunder Crater is simple: travel to Stormsunder Crater and meet Azurathel there.
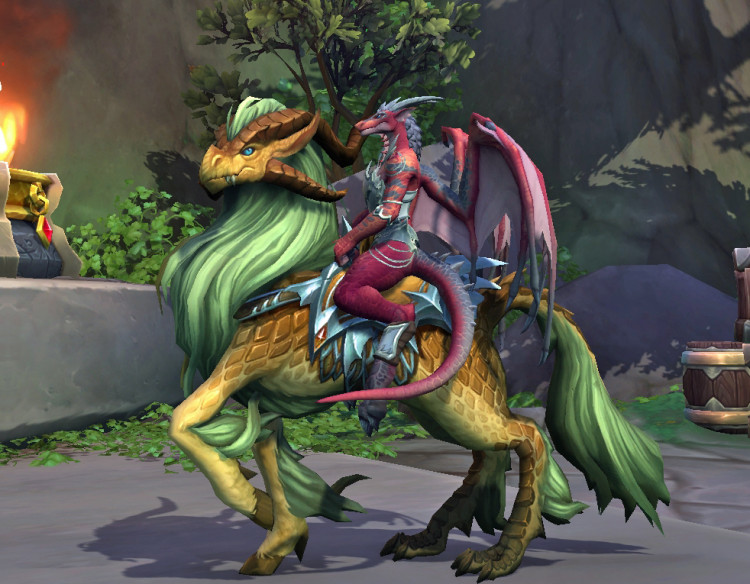
But before you go, check in with Treysh to learn Apprentice Riding and Journeyman Riding and pick up your choice of free Vorquin mounts: Obsidian Vorquin, Sapphire Vorquin, Bronze Vorquin, or Crimson Vorquin.
Vorquin in Sassy Bronze
To get to Stormsunder Crater, ride due east until you reach a platform at Talonlord’s Perch at /way 61.4 64.8, and use Soar to reach your destination.
There’s another potential distraction here. A vicious silver elite dubbed Ketess the Pillager lives near the platform. This is an extremely difficult monster, and you are unlikely to be able to solo it with your level and equip. Fortunately, if things get hectic enough, you can nearly always get aid. Killing Ketess grants you the Earthbound Tome, a clickable buff item that grants you Earth Shield for 10 minutes.
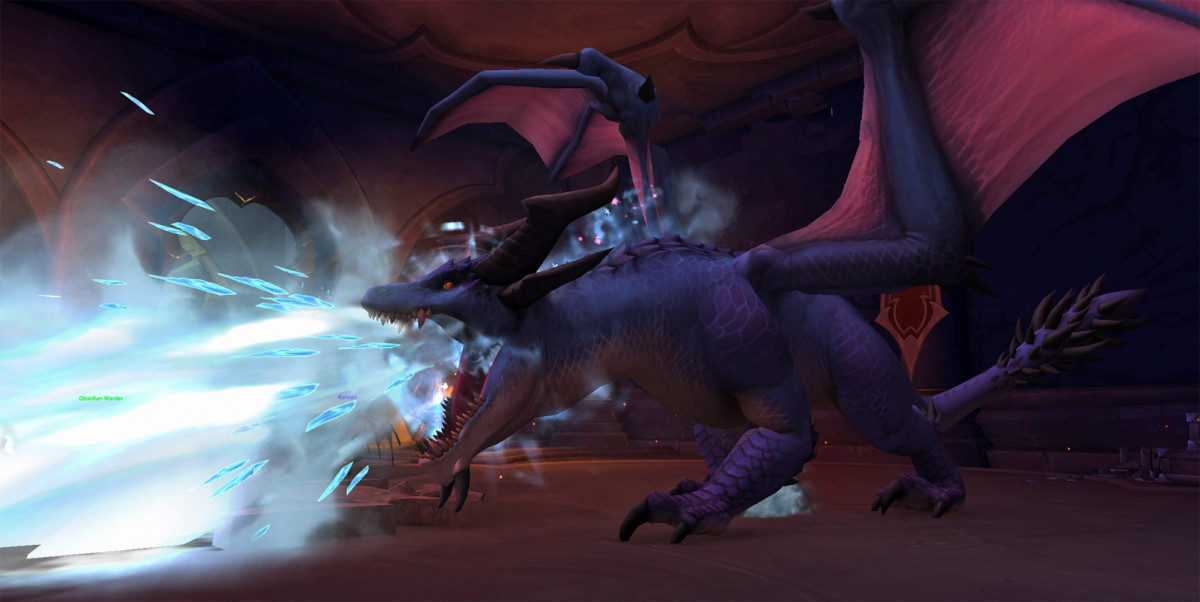
Completing this grants a new spell, Deep Breath, a showy spell which sees you flying above your foes while spitting fiery cinders along their route. Only use when you have a large number of foes to burn at once.
Tangle with the Tarasek, Conjured Army, and The Primalists
Tangle with the Tarasek: slay 7 tarasek, Crimson Dracthyr Battlegear Bracers
Conjured Army: slay 12 conjured elementals
The Primalists: find clues to the Primalists’ origins and intentions and leaders
Because they are all in the same location, you may switch between them on your map. Tazenrath, another hard-hitting unique creature in this region, drops another boost item, Runic Wing, which casts a 10-minute Arcane Barrier.
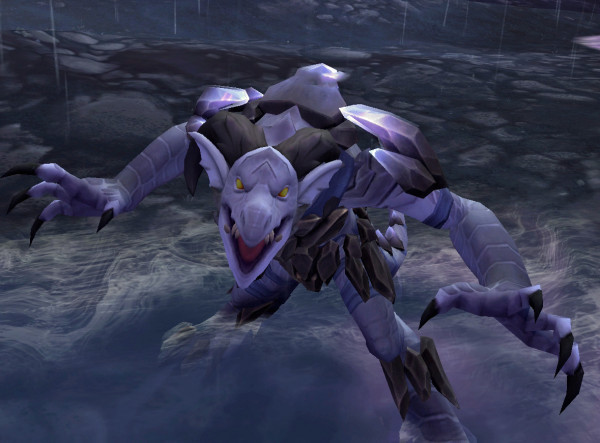
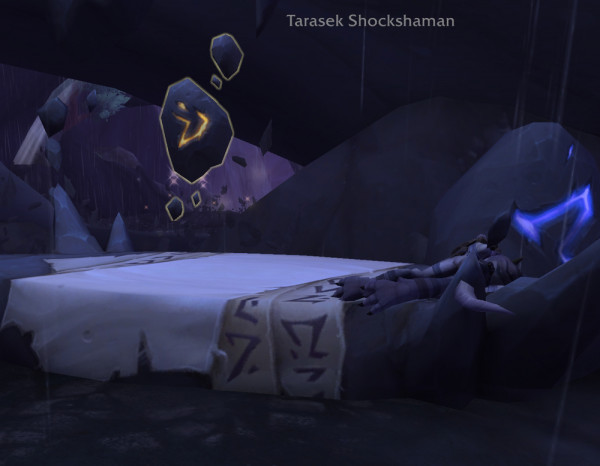
The kill missions are rather simple. The elementals are tiny groups of Conjured Stormling that are readily defeated by your Azure Strike. The Tarasek are grey lizard-rocklike monsters that mostly appear as Infused Tarasek and Tarasek Shockshaman; these attack very powerfully, so utilize your interrupts accordingly.
The three Primalist clues — intentions, motivations, and leaders — are all objects you need to click throughout Stormsunder Crater. These are well marked on your minimap.
Primalist target. Ignore the casualty.
Once completed, go up the ramp to do your turn-ins and collect your reward from Tangle with the Tarasek, Crimson Dracthyr Battlegear Bracers.
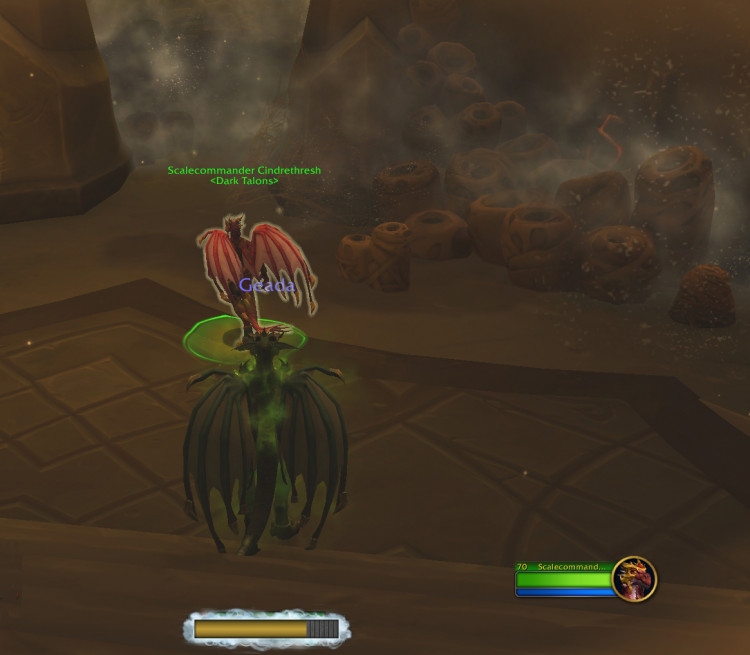
The Ebon Scales
Reach Scalecommander Sarkareth.
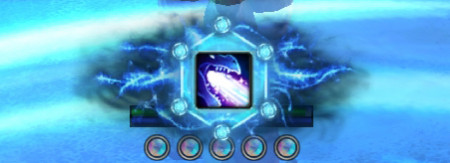
This is another another simple mission. You just race down the hill toward the location marked on your minimap, ignoring any adds that may approach you along the way. Once within the circle, you’ll receive an additional action button that casts Mass Disintegration. Everything hostile around you will perish, and you will be treated to an intriguing cinematic. Return the mission to receive your prize, Ekrazathal’s Colored Fang.
Rally to Emberthal
Report to Emberthal in the Old Weryn Grounds.
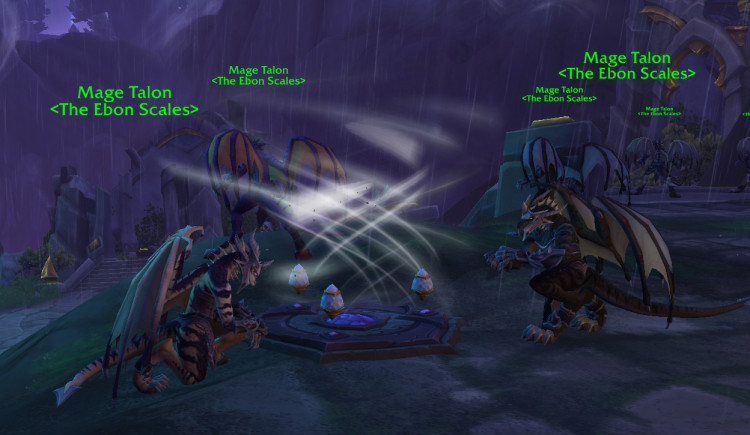
Again, you’ll find a Soar Enhancer just a few steps away, attended by Mage Talons from the Ebon Scales. Step on it and you’ll fly yourself back to Old Weryn Grounds.
Turn in your quest to Emberthal.
This concludes Chapter 4: The Ebon Scales.https://www.wowhead.com/robots.txt?upapi=trueAD
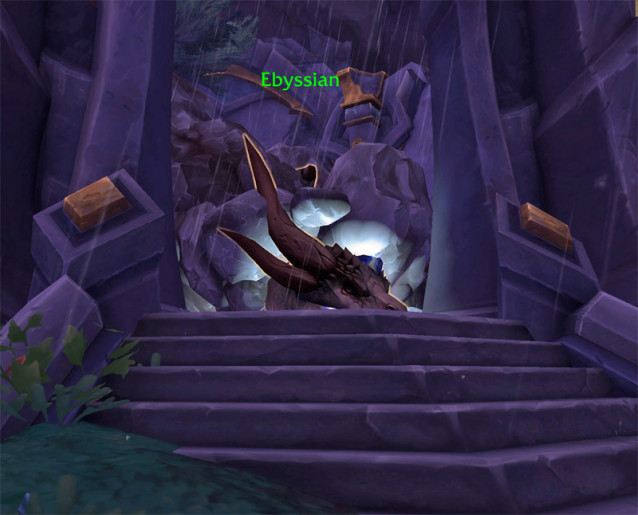
Chapter 5: Froststone Vault
This chapter begins with a cinematic introducing your two new dragon aspect escorts, Ebyssian and Wrathion. This chapter is likewise exceptionally short.
Preservation or Devastation
Choose a specialization – Preservation or Devastation
The DPS spec is Devastation, while the Healer spec is Preservation. Devastation is more associated with the Red and Blue dragonflights, whereas Preservation is associated with the Emerald and Bronze dragonflights. Depending on your pick, you will gain the following new abilities:
- Devastation: Pyre, Landslide, Quell, Ruby Essence Burst (Passive), Mastery: Giantkiller (Passive)
- Preservation: Dream Breath, Mass Return, Echo, Verdant Embrace, Naturalize, Expunge, Mastery: Life-Binder (Passive)
During the starting zone experience, you will not have access to the whole Devastation or Preservation talent trees. There’s also no apparent victor for whatever works “better” in the beginning section, because most of the tasks don’t rely on one over the other. In fact, some of them will give you the option of healing or attacking. You have the option of doing both.
When the class guides for Devastation and Preservation become available, we will post links to those here.
Completing your choice awards the Crimson Dracthyr Battlegear Leggings.
The Froststone Vault
Report to Scalecommander Sarkareth at Froststone Vault.
You’ll need to Soar north and slightly east to get to Scalecommander Sarkareth, but it’s an easy trip. Don’t forget to use Skyward Ascent and Surge Forward or you won’t quite make it.
The Prize Inside
Defend the vault.
Depending on your speciality or preferences, you can achieve this in one of two methods. You will be given a progress meter to fill, which will credit you with either slaying enemies at the platform’s bottom or healing ally NPCs. There is no faster or “better” method to achieve this, so simply do anything you want until the progress meter fills up. Once completed, turn in the quest to receive the Emerald Tear Necklace as your prize.
You should reach level 61 at this point in the starter zone*.
*If you are playing this during prepatch between November 15-28, you will not advance beyond 60. This only applies for those leveling Evokers after the expansion launch.
This concludes Chapter 5: Froststone Vault.
Chapter 6: Wrath of the Storm-Eater
Debuff Alert: You will have the debuff Wrath of the Storm-Eater for the duration of this chapter. You will be unable to Soar or use your Vorquin mount while this is active. You can still Glide, but it will be of little use in this chapter.
Run!
Retreat!Outrun the Avatar of the StormWrathion found and healed
Run to the first area indicated on your map to fulfill the requirement Outrun the Avatar of the Storm. You will need to go slightly off the path to hit the circle. Once you’ve done that, your goal will change to Wrathion Found.
Run down the hill to Wrathion and use whatever healing abilities you have to heal Wrathion. Turn in the quest to Wrathion.
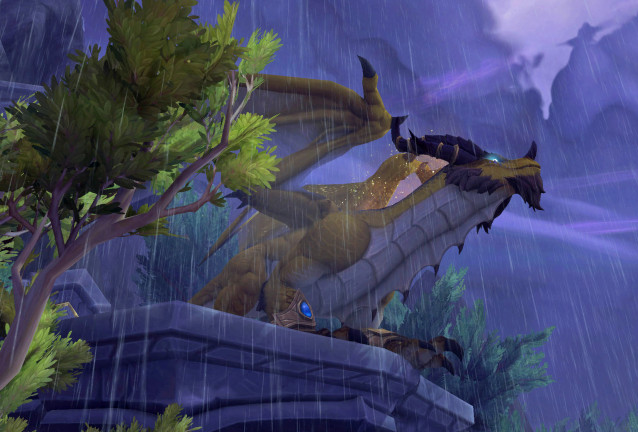
The Consequence of Courage
Find EbyssianEbyssian healed
Ebyssian is down the road, and there are a lot of mobs between you and him. To dodge most of the mobs, stay hard right and you’ll find Ebyssian holed up in a small nook covered with stones. You may encounter a couple Windfiend groups along the route, but they are minor.
Heal Ebyssian (he takes quite a bit of healing up compared to Wrathion, particularly for a Devastation specialist). Turn in quest down the road to Emberthal and collect your Crimson Dracthyr Battlegear Monnion (shoulders).
Final Orders
Reach the Old Weyrn GroundsSpeak with NozdormuSarkareth spoken toViridia spoken to
Your final orders are to organize the evacuation of Forbidden Reach. This sounds more involved than it is; all you really need to do is return to the Old Weryn Grounds. Cross the bridge and go up the stairs to report in with Nozdormu. You’ll get a cinematic and automatically have Speak to Nozdormu completed.
Your next objectives are on the platform underneath Nozdormu. You can Glide down instead of jumping if you choose, but you cannot Soar or utilize your mount.
You’ll hear some discussion about the group as you make your way through to chat with Sarkareth and Viridia. Wrathion will head to Stormwind City, while Ebyssian will fly to Orgrimmar to seek assistance from the Alliance and Horde. This tells you who you’ll be traveling with in the last chapter.
Turn in to Scalecommander Azurathel and collect the Dragonkin Signet Ring.
This concludes Chapter 6: Wrath of the Storm-Eater and your adventures in the Forbidden Reach.
Chapter 7 – All Along the Watchtowers/The Dark Talons
The last chapter of your first campaign is the first time you’ll notice a difference between the Alliance and Horde Dracthyr starting experiences, and it’s primarily due to the location. The missions are mostly identical, with the exception of a number of quest titles that alter slightly.
You will now find yourself standing at either the gates of Stormwind with Wrathion or the gates of Orgrimmar with Ebyssian, depending on your faction.
Draconic Connections / Spiritual Allies
Gain entrance to Stormwind or Orgrimmar.
You, several other Dracthyr, and your draconic escort emerge at the gate to your main faction city, where you confront guards and a commander who finally allows you to enter. Before entering, report to Scalecommander Azurathel (Alliance) or Scalecommander Cindrethresh (Horde).
Ground Leave / Ground Leave
Explore the city. Visit the Auction House, Bank, Embassy, and Portal Room.
Wait for a discussion in which you are granted entry. It’s not as awful as the Death Knight reaction, but you won’t get a warm welcome from everyone.
You might also want to take up Expert Riding and Artisan Riding at this time so you can fly about the city on horses. While Soar may be used here, ordinary flight is preferable. You can also choose whatever career you like, but that can be done later.
Alliance will need to finish at Stormwind Keep and report to Azurathel, /way 80.1 27.2
Horde will need to go to the Valley of Wisdom, upper level near the Tol Barad portal, /way 44.2 38.4, and report to Cindrethresh.
Aspectral Invitation / Aspectral Invitation
Speak to Wrathion or Ebyssian.
Wrathion said: No one threw any fruit at you, did they? I am told that happens sometimes.
Wrathion and Ebyssian will fill you in on what happened in the Alliance or Horde Councils in regard to the Aspects’ invitation to the Dragon Isles.
An Iconic, Draconic, Look / An Iconic, Draconic, Look
Ask Wrathion or Ebyssian about Visage FormLearn about Visage v FormAdopt a Visage Form
Visage, the ability to transform into your humanoid form, is taught to you by Wrathion or Ebyssian. You choose this form when creating your character, and you can modify it at the Barber Shop.
Your first Visage appears as a special action button for the first use. After that, you receive two Racial abilities — Visage (switch between forms) and Chosen Identity.
You may use Chosen Identity to automate the process of switching between your Dracthyr and Visage forms. If it is not active, you will always be in Dracthyr form. After you activate the Chosen Identity variant, you immediately adopt your Visage when you leave battle or after Soaring.
Visage and Chosen Image, with Chosen Image not activated
Visage and Chosen Image, with Chosen Image activatedhttps://www.wowhead.com/robots.txt?upapi=trueADCongratulations! You’ve completed the Dracthyr starter zone and can now pick up other quests to further your adventures. Pick up ![]() Expeditionary Coordination /
Expeditionary Coordination / ![]() Expeditionary Coordination to travel on to the Aspects’ call to the Dragon Isles and take your place among Azeroth’s finest heroes!
Expeditionary Coordination to travel on to the Aspects’ call to the Dragon Isles and take your place among Azeroth’s finest heroes!
Evoker Leveling 60-70 in Dragonflight
After you leave the Forbidden Reach, you’ll join the rest of Azeroth’s gamers in the Dragon Isles for your 60-70 leveling experience. Our Evoker class authors will be providing leveling specs and advice for you shortly, so keep an eye on this space for updates!


