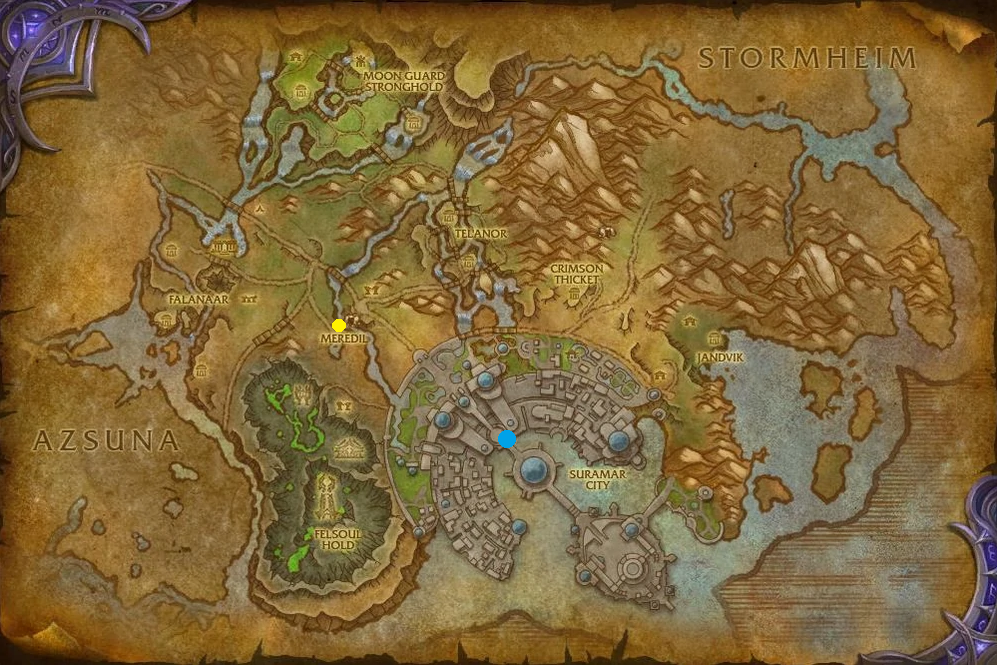
Court of Stars is a dungeon located in Suramar, Broken Isles and is designed for players at level 70. The entrance to the dungeon is located on the south coast of Suramar, near the city of Meredil. Both Alliance and Horde players can reach the dungeon by flying to Meredil and heading eastward.
This guide aims to provide a comprehensive overview of the Court of Stars dungeon, including vital information to successfully complete it on Mythic and Mythic Keystone difficulty. It will cover all three boss fights and the most notable trash enemies in the dungeon, along with their important abilities. If you are interested in learning about the other Dragonflight Dungeons or the upcoming Mythic+ season, please refer to our linked overviews. Let’s begin without any further delay.
Unlock Unique Profession/Class Bonuses in Court of Stars
You can take advantage of various Profession/Class bonuses available throughout the dungeon, each providing you with unique powers or utilities. Here’s more information on where to find them and what they do:
- Wounded Nightborne Civilian can be used by all Healers or anyone with Tailoring profession. The special effect will be summoning a “miniboss” which will reduce the number of Felbound Enforcers you have to kill in the area around Talixae Flamewreath.
- Bazaar Goods can be used by Rogue, Warrior and anyone with Leatherworking profession. The special effect will be summoning a “miniboss,” which will reduce the number of Felbound Enforcers you have to kill in the area around Talixae Flamewreath.
- Arcane Power Conduit can be accessed by Gnomes, Goblins races and players with Engineering profession. The special effect will debuff all Guardian Constructs, stunning them for 5 sec every 20 seconds.
 Flask of the Solemn Night can be used by Rogue and players with Alchemy profession. The special effect will skip the last “phase” of Patrol Captain Gerdo boss encounter (the Enraged Phase), and instead of empowering him, it will cause him to die from the poison instantly.
- Waterlogged Scroll can be used by Shaman and players with Skinning or Inscription profession. The special effect will grant your entire party 35% movement speed.
- Umbral Bloom can be used by Druid and players with Herbalism proffesion. The special effect will grant your entire party with 10% Haste.
- Starlight Rose Brew can be used by Death Knight and Monk. The special effect will grant your whole party improved health and mana regeneration.
- Lifesized Nightborne Statue can be used by players with Mining and Jewelcrafting profession. The special effect will be summoning a “miniboss,” which will reduce the number of Felbound Enforcers you have to kill in the area around Talixae Flamewreath.
- Nightshade Refreshments can be used by Pandaren race and players with Cooking or Herbalism profession. The special effect will grant your party 10% increased health.
- Discarded Junk can be used by Hunter and players with Blacksmithing profession. The special effect will summon a “miniboss” at the Talixae Flamewreath boss fight, which will spawn an armed trap. Walking over it will deal 10% of their health and increase their damage taken by 25% for 30 seconds.
- Magical Lantern can be used by Mage class, Blood Elf / Night Elf races, and players with Enchanting profession. The special bonus will grant your entire party a 10% increased damage bonus.
- Fel Orb can be used by Demon Hunter, Paladin, Priest, and Warlock classes. The special effect will grant your entire party a 10% increased Critical Strike chance bonus.
- Infernal Tome can be used by Demon Hunter, Paladin, and Priest classes. The special effect will grant your entire party a 10% damage reduction bonus.
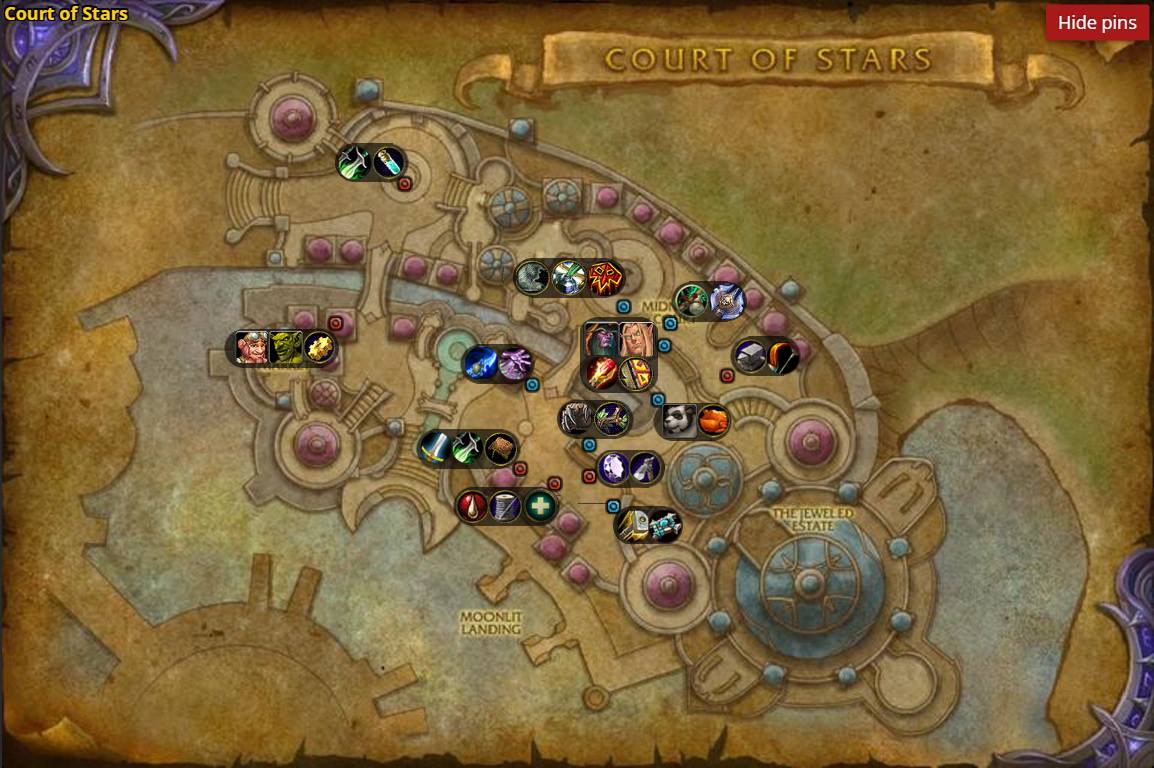
The Gilded Market and Patrol Captain Gerdo
Patrol Captain Gerdo Trash
Before the fight with Talixae Flamewreath, players who are Rogues or have the Alchemy profession can poison the Flask of the Solemn Night. When the boss reaches 25% health and attempts to consume the flask, it will instantly die instead of becoming empowered.
- Watch out for the Duskwatch Guard‘s
 Quelling Strike frontal ability (it always goes on your tank. In addition, use Purge or Dispel effects once you see them cast
  Fortification, it will reduce their damage taken by 25% and increase their Haste by 25%!
 - Step away from the Mana Wyrm once they reach critical health levels. Upon death, they will cast
 Wild Detonation, which you must avoid at all costs.
 - Guardian Constructs is the toughest mob in this area; make sure you always interrupt its
 Suppress silence channel cast. In addition, they will cast
  Charging Station; if not interrupted, it will heal and increase the damage of the nearby mobs. This is going to be your priority-target to kill!
 - Stop the Duskwatch Sentry once they run toward the nearby Signaling Beacon. If they finish the
 Sound Alarm, they will spawn a few trash mobs that give no count, so make sure you stop them at all costs! (Using stun is a great way to stop it).
 - Sidestep the Charged Blast from Bound Energy.
- Mana Saber will always cast
 Mana Fang on the furthest enemy; use a personal defensive if you are at low health.
Patrol Captain Gerdo Guide
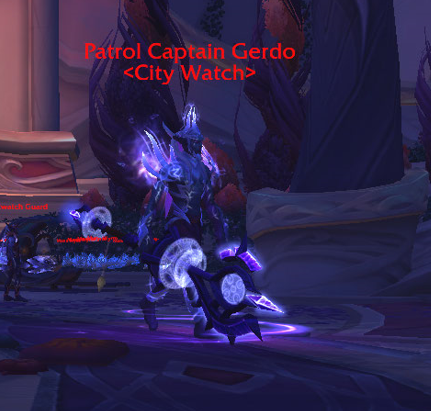
Rogue and players with Alchemy profession, can interact with ![]() Flask of the Solemn Night and poison it before the fight begins. This will allow you, once the boss goes for its
Flask of the Solemn Night and poison it before the fight begins. This will allow you, once the boss goes for its ![]() Flask of the Solemn Night to instantly die rather than empowering itself (she casts that ability at 25% health).
Flask of the Solemn Night to instantly die rather than empowering itself (she casts that ability at 25% health).
All Roles
- Avoid the Resonant Slash frontal-cone ability.
- Once you see the
 Arcane Lockdown cast, jump 3 to remove the 3 applications of the debuff (you can also dispel it).
 - If you have de-activated all the Signaling Beacons upon the cast, the boss will not be able to summon any Vigilant Duskwatcher.
Tank
- If any Vigilant Duskwatchers spawn, take the aggro and stack them close to the Patrol Captain Gerdo to allow your DPS to cleave all targets simultaneously.
Healer
- Dispel the Arcane Lockdown
- If any Vigilant Duskwatcher, watch out for their
 Hinder cast. Yes, you can dispel the stun effect!
 - If you do not have Rogue or anyone with Alchemy profession, use your healing cooldowns once the Patrol Captain Gerdo casts Flask of the Solemn Night.
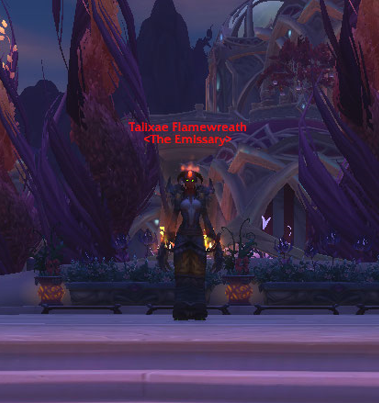
Midnight Court and Talixae Flamewreath
Talixae Flamewreath Trash
The trash mobs in the Midnight Court area are relatively straightforward, but there are a few things to keep in mind. The Gilded Ravagers will cast Golden Bomb which will deal damage and stun anyone caught in the blast radius. Court Attendees will cast Courtyard Sweep which will knock players back, so it’s important to be aware of your positioning. Finally, Dreadful Huntresses will occasionally cast Debilitating Shriek, which will deal damage and reduce the healing received by anyone caught in the area of effect.
The three minibosses that you must defeat before reaching Talixae Flamewreath are:
1. Broker Bo’tzun: This miniboss has a number of tricks up his sleeve. He will periodically cast Shroud of Concealment, making himself and his allies temporarily invisible. He will also cast Coin Sweep, which will deal damage and knock players back. Finally, he will summon several Broker’s Menagerie adds, which must be dealt with quickly.
2. Oranomonos the Everbranching: This miniboss is essentially a large tree with a variety of attacks. He will periodically cast Overgrowth, which will root players in place. He will also summon Wild Hunt Worgs adds, which must be dealt with quickly. Finally, he will cast Rotten Breath, which will deal damage and reduce the healing received by anyone caught in the area of effect.
3. Devout Darkness: This miniboss is a caster who will periodically cast Shadow Bolt at a random player. He will also summon Dark Manifestations adds, which must be dealt with quickly. Finally, he will cast Siphon Life, which will drain health from all players and heal himself.
Once you have defeated these minibosses, you will be able to engage Talixae Flamewreath.
- Watch out for Blazing Imps‘
 Drifting Embers. Do not underestimate them just because they have lower health; use mass stun effects to stop the channel cast when available.
 - Use defensive when Watchful Inquisitors are casting
 Eye Storm. This is a high-damage alert and your healer must be ready with their cooldowns if needed!
 - Interrupt the
 Bewitch cast from Shadow Mistress. In addition, your tank must pay attention to
  Shadow Slash, especially if they pull that trash mob with any other non-boss-enemies.
 - Beware of the Legion Hound and their
 Felblaze Leap. It will always go on a random target, which can catch you by surprise!
 - At last, the mandatory Felbound Enforcers you must kill in this area. They have only one cast —
 Fel Detonation, which you can line off sight before it ends to avoid the massive damage you will take from it!
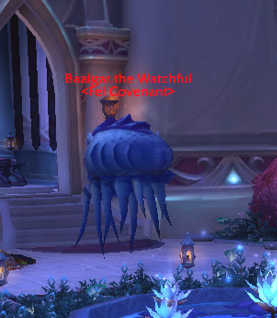
You must defeat the 3 minibosses that surround Talixae Flamewreath since each of the demonic emissaries will grant ![]() Bond of Cunning aura, which will make the boss fight significantly harder. Here is what each of them does.
Bond of Cunning aura, which will make the boss fight significantly harder. Here is what each of them does.
Baalgar the Watchful
Baalgar the Watchful will have 2 important abilities ![]() Disintegration Beam and
Disintegration Beam and ![]() Impending Doom. Your kicks should go on
Impending Doom. Your kicks should go on ![]() Disintegration Beam and your healer must be aware of how
Disintegration Beam and your healer must be aware of how ![]() Impending Doom works — it will always go on a 2 random players from your party. Upon dispelling, it will trigger an AoE explosion to all enemies.
Impending Doom works — it will always go on a 2 random players from your party. Upon dispelling, it will trigger an AoE explosion to all enemies.
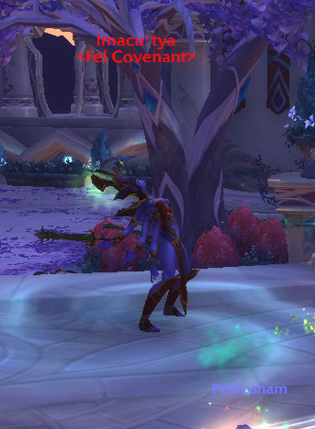
Imacu’tya
Imacu’tya will be annoying for melee players since you must run out of melee when she casts ![]() Whirling Blades. In addition, make sure you interrupt her
Whirling Blades. In addition, make sure you interrupt her ![]() Scream of Pain cast, or else it will damage everyone in your party.
Scream of Pain cast, or else it will damage everyone in your party.
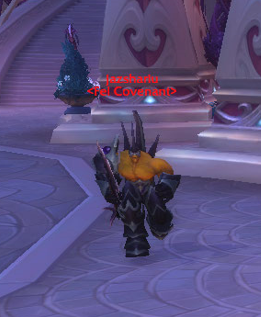
Jazsharlu
Jazsharlu has lethal frontal cast — ![]() Shockwave, which will stun you and
Shockwave, which will stun you and ![]() Crushing Leap, randomly targeting anyone from your party and dealing damage to them.
Crushing Leap, randomly targeting anyone from your party and dealing damage to them.
Talixae Flamewreath Guide
All Roles
- Interrupt all
 Withering Soul casts.
 - Stack together for the
 Infernal Eruption, but make sure you do not get hit by the initial damage.
 - Focus on the Infernal Imps as soon as they spawn from Infernal Eruption.
Tank
- Stack all the Infernal Imps on top of the Talixae Flamewreath.
Healer
- Be ready to top up your party when Talixae Flamewreath is casting
 Burning Intensity.
 - If Withering Soul cast goes through, you can dispel the effect.
The Jeweled Estate and Advisor Melandrus
Advisor Melandrus Trash
Gerenth the Vile is the only boss in this wing, and it is a relatively straightforward fight. The boss will summon Fury of the Fel, which is basically an add that you want to prioritize. Gerenth the Vile will also occasionally cast Felblast, which is an ability that will damage and stun players in a small area. It is important to avoid this ability, especially on higher difficulties. Additionally, the boss will have an ability called Draw Soul, which will slowly drain the life of the targeted player and will give the boss a healing effect based on the amount of health drained. Players need to quickly break the channeling of this ability by damaging the boss. Finally, the boss will have an ability called Nether Rip, which is a frontal cone attack that will damage and knockback players. You want to avoid this ability by positioning yourself behind the boss. Overall, this boss fight is not too difficult, but it can be challenging if you do not prioritize the adds and avoid the avoidable abilities.
 Shadow Bolt Volley is unavoidable AoE damage that will be cast upon your party every couple of seconds.
- Your tank must beware with
 Vampiric Claws as it deals serious initial damage and heals the Gerenth the Vile.
 - Your whole party must pay attention to the
 Hypnosis Bat and use a stun effect to stop his cast; otherwise, the person that gets targeted by it will be charmed and turn hostile.
All Roles
 Blade Surge will be cast on the furthest player from your party, dealing serious initial damage and leaving a hard ticking
  Bleed effect, so you want to “bait” it at a good spot. Reminder, after the charge, the boss will leave an image of Advisor Melandrus.
- Avoid the rotating
 Piercing Gales on the ground. They will appear at the location where Advisor Melandrus begins his Blade Surge cast.
 - Avoid the Piercing Gale ground animation. Remember that any images of Advisor Melandrus will copy this ability when cast.
Tank
- Continuously relocate the boss so you avoid any nearby images of Advisor Melandrus and their Piercing Gales.
Healer
- Use your healing cooldowns when the boss is casting
 Slicing Maelstrom. A reminder that images of Advisor Melandrus will also copy this ability when cast.
Court of Stars Loot Table
Patrol Captain Gerdo
| Type | Item | Stats |
|---|---|---|
| Mail Shoulder | Crit/Mastery | |
| Cape | Crit/Haste | |
| Cloth Chest | Haste/Mastery | |
| Leather Hands | Crit/Haste | |
| Plate Boots | Crit/Haste | |
| Trinket | Int |
Talixae Flamewreath
| Type | Item | Stats |
|---|---|---|
| Crossbow | Mastery/Vers | |
| Mail Head | Haste/Crit | |
| Neck | Haste/Vers | |
| Plate Chest | Haste/Crit | |
| Cloth Waist | Crit/Haste | |
| Leather Legs | Haste/Crit | |
| Trinket | Int |
Advisor Melandrus
| Type | Item | Stats |
|---|---|---|
| Staff | Haste/Mastery | |
| 1H Sword | Mastery/Crit | |
| Plate Head | Haste/Mastery | |
| Leather Head | Mastery/Vers | |
| Neck | Vers/Mastery | |
| Cloth Shoulder | Crit/Haste | |
| Mail Chest | Vers/Mastery | |
| Mail Waist | Haste/Crit | |
| Plate Waist | Mastery/Crit | |
| Cloth Legs | Haste/Vers | |
| Leather Feet | Crit/Mastery | |
| Finger | Haste/Crit | |
| Trinket | Mastery |
Court of Stars Achievements
There are 5 total achievements to obtain in Court of Stars:
| Achievement | Criteria |
|---|---|
| Defeat Advisor Melandrus in Court of Stars on | |
| Defeat Advisor Melandrus in Court of Stars on | |
| Complete Court of Stars at | |
| Witness the conversation between Advisor Melandrus and Grand Magistrix Elisande in Court of Stars on | |
| Disable each of the watchposts after Patrol Captain Gerdo signals them and then defeat him in Court of Stars on |